how to manage invite links
- The “Manage” tab is where creators can create links, manage the whitelist, and set VIP status.
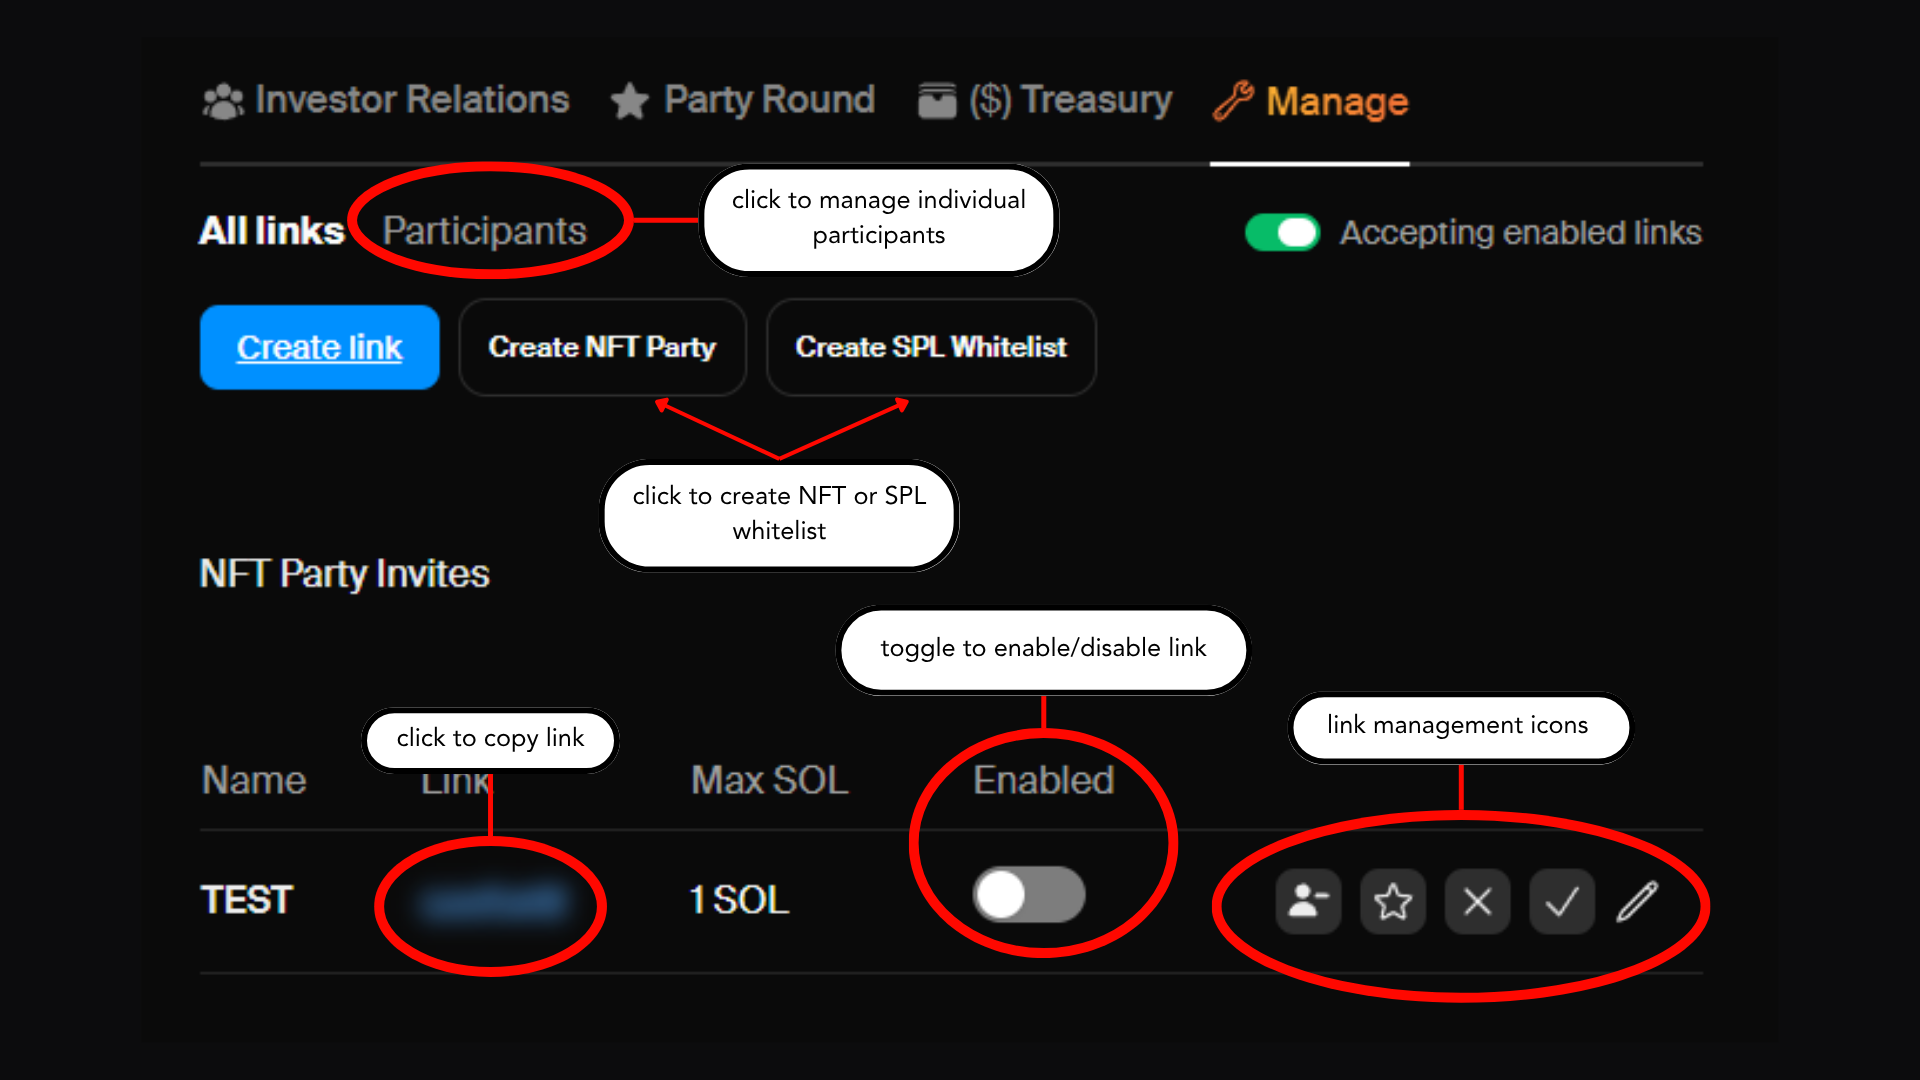
- The “Create Link” button will allow you to create an invite link for your raise.
- Here you can set the allocation and name the link.
- We recommend you use the naming feature to stay organized.

- Clicking on the blurred out blue text next to the link name will copy it so you can share it.
- Next to the link you will see some icons:
- Silhouette with minus sign: this removes VIP status for everyone who has signed this link.
- Star: this gives VIP status to everyone who has signed this link.
- Checkmark: this approves everyone who has signed this link.
- X: this unapproves everyone who has signed this link and puts their status as “pending.”
- Clicking these icons will only change status for people who have already signed the link.
- Example: If you give Daniel a link and he signs it, then you approve the link and mark it as VIP, Daniel will be approved as a VIP. If Roy signs the link after this, he won’t be approved or marked as VIP until you click the icons again.
- Pencil: this allows you to rename the link and change the allocation.
- You can also manage approvals and VIPs individually when you click “participants.”
- This is sometimes necessary in the event that a link gets leaked to people you don’t want to participate.
- This also filters by pending, approved, and ignored & revoke.
- You can enable and disable a link at any time using the toggle under “enabled.”
- This is sometimes necessary when links get leaked.
managing nft whitelists
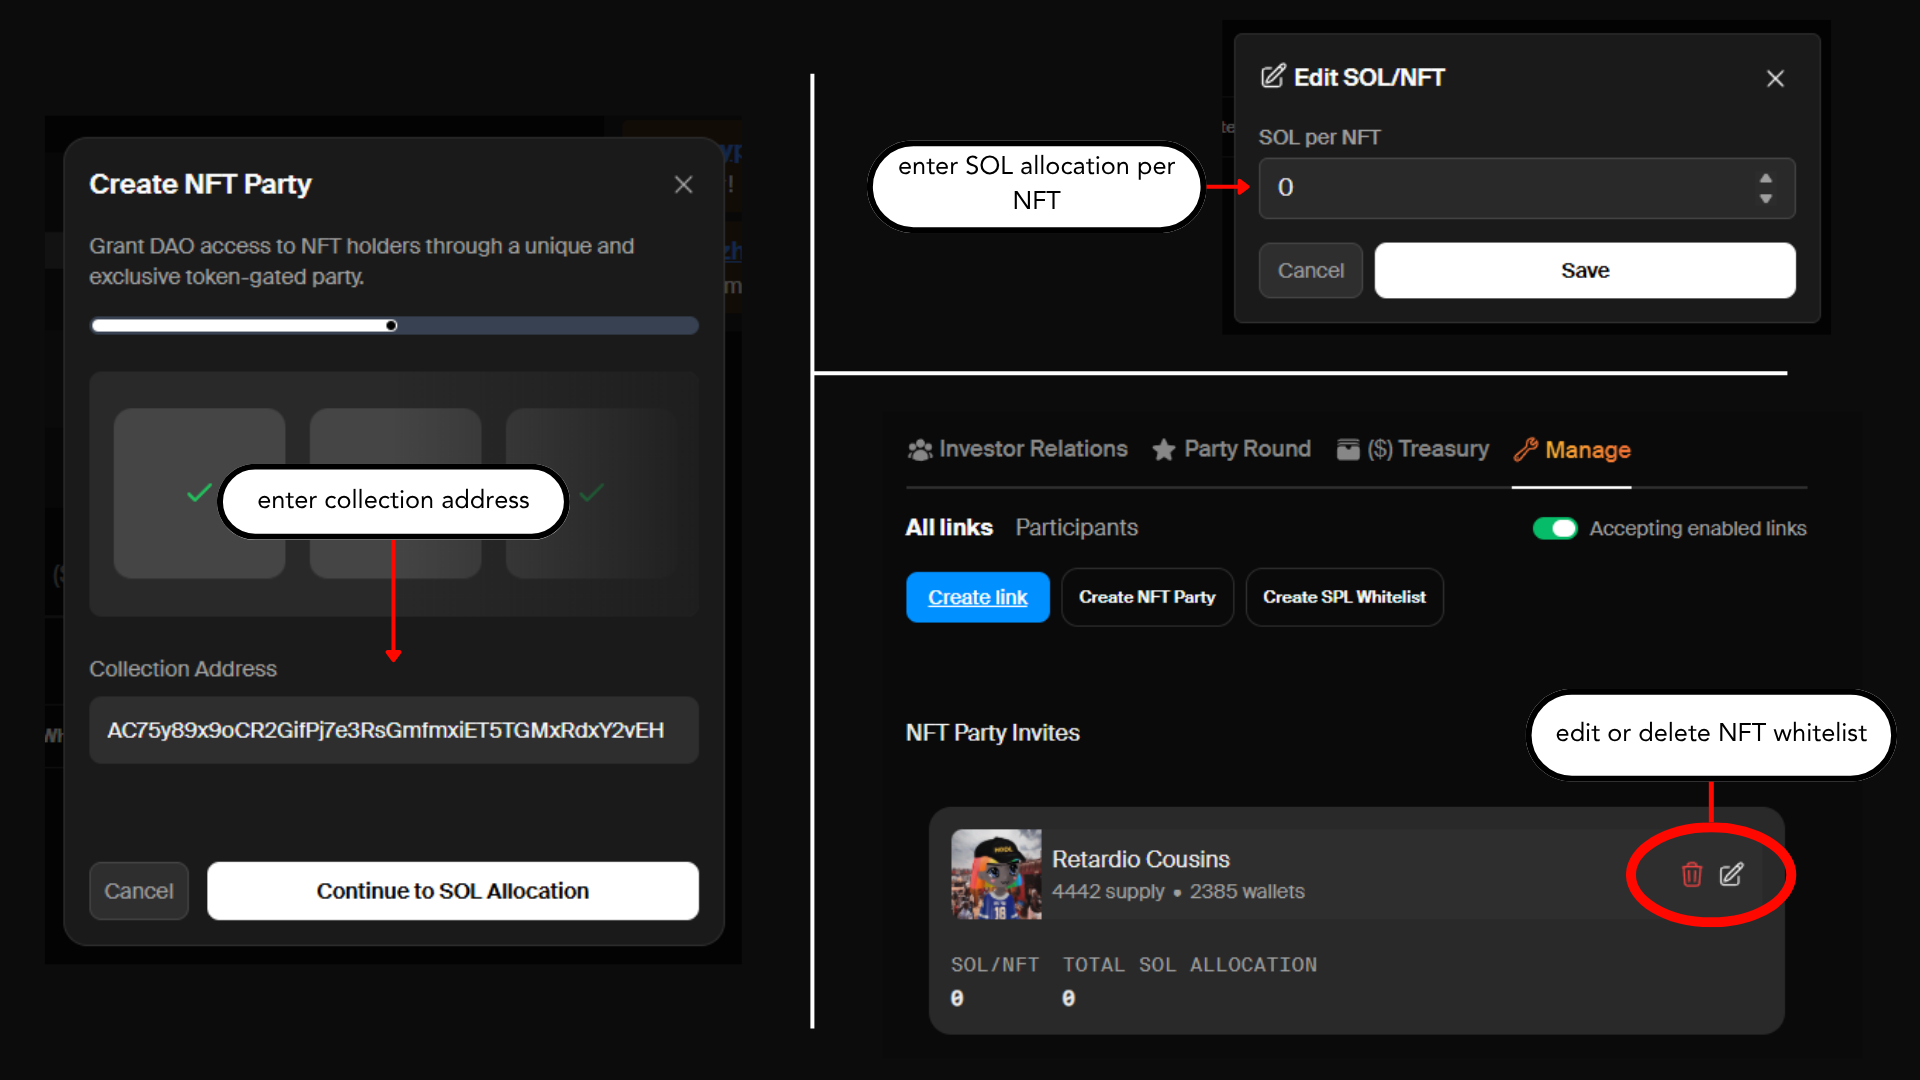
- To whitelist an NFT collection, click “Create NFT Party.”
- You will need the Collection Address. It’s easy to find on Magic Eden if you inspect one of the NFTs in a collection.
- Once you click “Continue to Sol Allocation,” the WL will be created and a holder snapshot will be taken.
- There is a bug currently where you need to click “x” to continue the process. We are working on it.
- You can edit the allocation by clicking on the pencil.
- Here you can determine how much Sol is allocated per NFT.
- Participants whitelisted via a NFT collection will automatically be added to the Public Commit phase.
managing spl whitelists
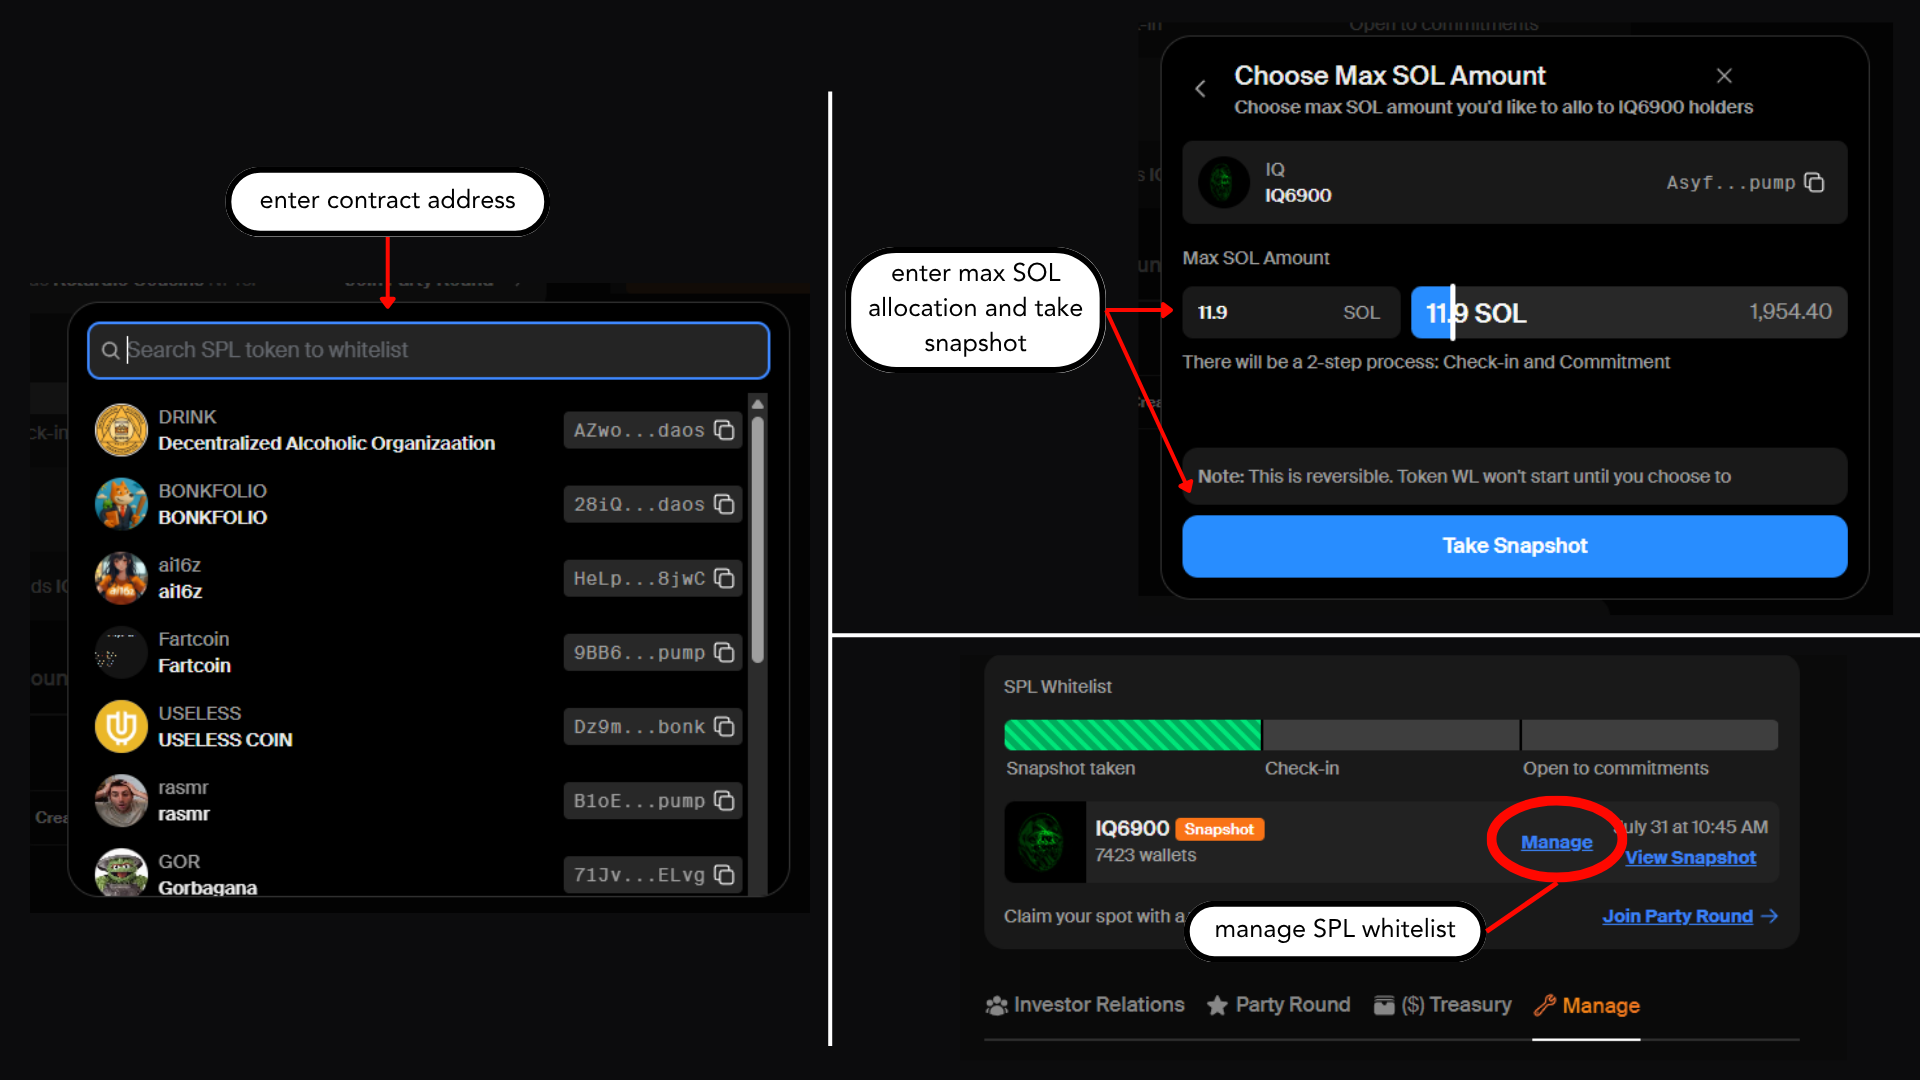
- To whitelist SPL token holders, click “Create SPL Whitelist.”
- You can search for the token by name or contract address.
- We recommend searching by CA to ensure you WL the correct token.
- You will need to determine a max sol amount allocated to holders of this token.
- Their individual allocation scales with the number of tokens they hold.
- Once you click “Take Snapshot,” a snapshot will be taken and the WL will be created.
- You will need to click “Manage” to start the check-in.
- Users need to check in if they would like to participate.
- You will then need to click “Manage” again to open commitments.
- Users can only commit if they checked in during the check-in phase.
- Participants whitelisted via a SPL token will automatically be added to the Public Commit phase.